Did Curing my ANYCUBIC High Clear Part make it Cloudy or was it Something Else?
My staple resin is ANYCUBIC Basic Clear. I’m designing jewelry items that are typically custom colors, so I felt it was prudent to have the full spectrum of Alcohol inks and stick to one resin that is easy to color, that being the Basic Clear. Essentially, I’d rather limit the types and colors of resin, and expand the Alcohol Ink selection as opposed to the other way around.
I’ve wanted to try the High Clear because there are many pieces that I design that would look great as a crystal clear solid. The High Clear marketing on the ANYCUBIC site spec page for High Clear portrayed the built objects as if the they were formed from crystal. The spec page does call out a varnishing process that is to be applied prior to curing the object; however, the processes and instructions for the build and finishing of an object put forth on the ANYCUBIC site seem to ignore the original purpose for curing which is to mechanically stabilize and strengthen the object (i.e. to bring the material to meet the mechanical specifications). In my opinion, it is very important to complete the build to meet spec; followed by buffing & polishing; then followed by varnishing/final finishing.
I bought a 1 kg bottle and proceeded to characterise the ideal exposure using the R_E_R_F 6K slicer file (I have the Photon Mono 6K). I set the base exposure to 3.5 seconds and let it run. It was sample #7 that was the undisputed best; that being a 5.0 second exposure. I have my exposure power set to 50%, so that may account for the increase in exposure over the recommended 4 seconds. These test samples were not crystal clear as you can see in the pic. All of the samples between 3.5 second and 4.75 second exhibited several reproduction failures but were not any more transparent than the 5.0 second ideal sample.
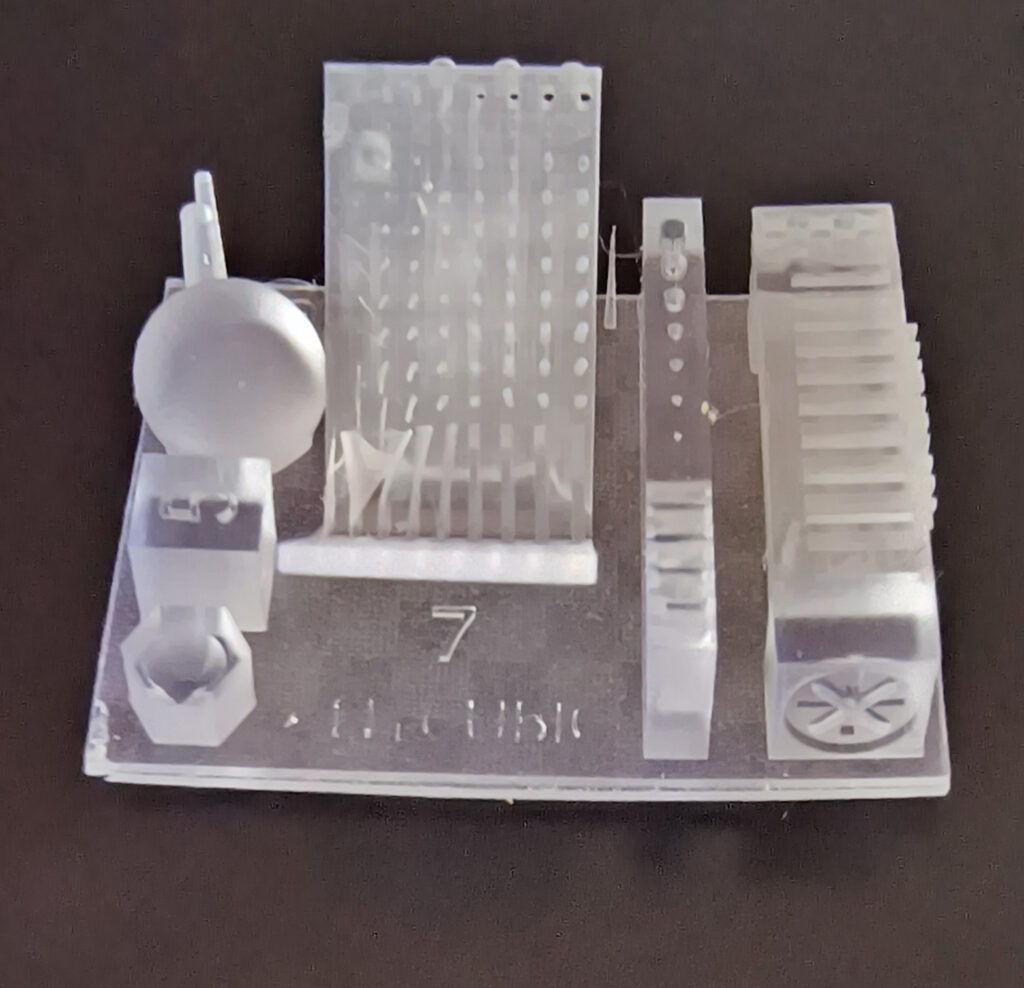
Upon inspecting the R_E_R_F sample #7, the clarity varied dependent upon the surface. Planar surfaces performed the best from a clarity standpoint where you can see through the hexahedron and other geometries having larger planar surfaces. The sphere was notably hazy (less transparent).
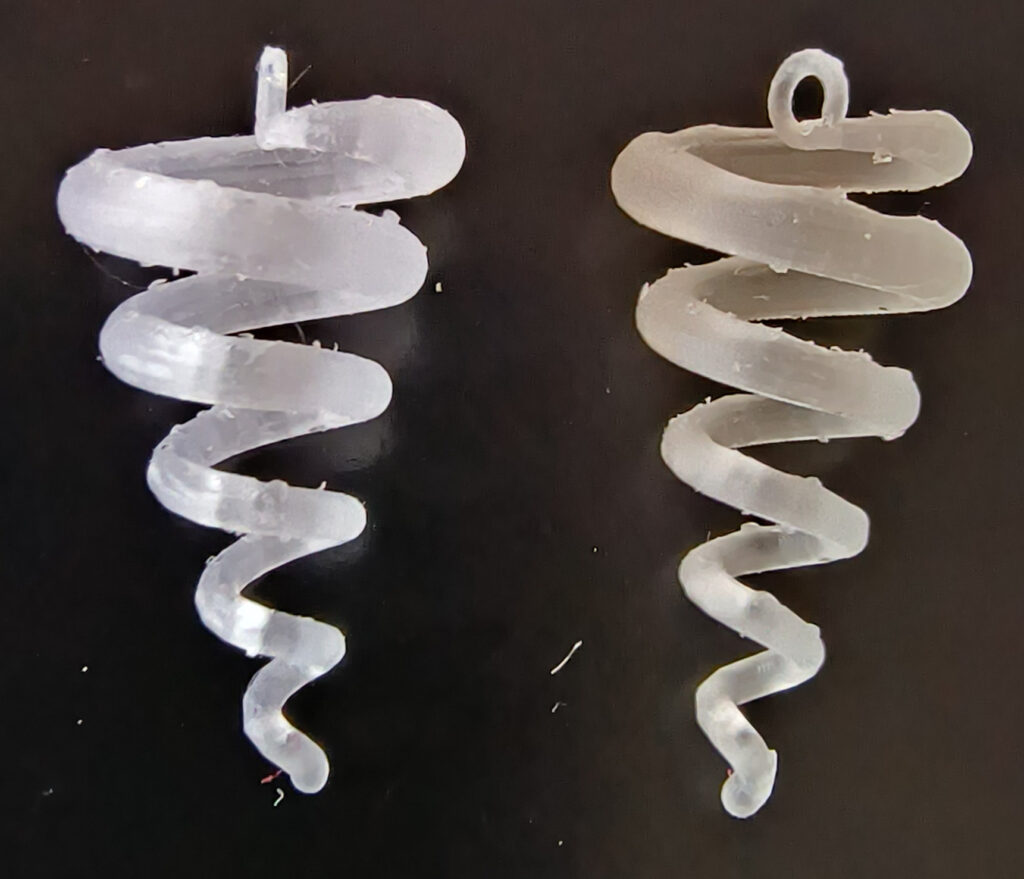
I ran a side-by-side test of a tapered helical spiral jewelry piece I designed comparing the Basic Clear to the High Clear. Each of the helical spirals in the pics are 22.7 mm x 12.1 mm at the widest dimension, with a pipe taper starting a 0.60 mm radius at the lower tip to 1.2 mm at the top so they’re fairly small parts. These were freshly trimmed pre-cure and then cured for 4 minutes. As you can see these were not deburred in order to compare the “as printed” comparison.
I was initially quite disappointed to find that there was very little difference, from a transparency standpoint, in comparison between the Basic and High Clear with only an improvement in that the High Clear didn’t yellow after a 4 minute UV cure cycle whereas the Basic Clear did. Both materials garnered near 100% transparency upon completing the 3D printing, but ultimately hazed and yellowed in the case of the Basic Clear upon completing a 4 minute UV cure. You’d think that it was the curing that caused a material physical degradation…or was it??
If polishing and/or varnishing can affect the transparency throughout the material, then it would suggest that the clarity is affected by the surface layer texture; not a physical change in the base material. As I mentioned when inspecting the R_E_R_F objects, planar surfaces boasted a decent “as built” transparency and clarity which would effectively have a lower density of triangles when the native NUBRS file is converted to the STL mesh format. Conversely when the surface has a texture or curvature, the converted file format must increase the density of instantiated triangles to reproduce the shape. The textured surface contains a much higher fractal plane count which refracts the light transmissivity thereby degrading the transparency. When the object is cured, the part shrinks to become a more accurate rendition of the mathematical mesh model. This fact becomes very apparent if you attempt to fit an uncured part to an alternate finished part. They don’t fit correctly, but once cured the fit is near perfect.
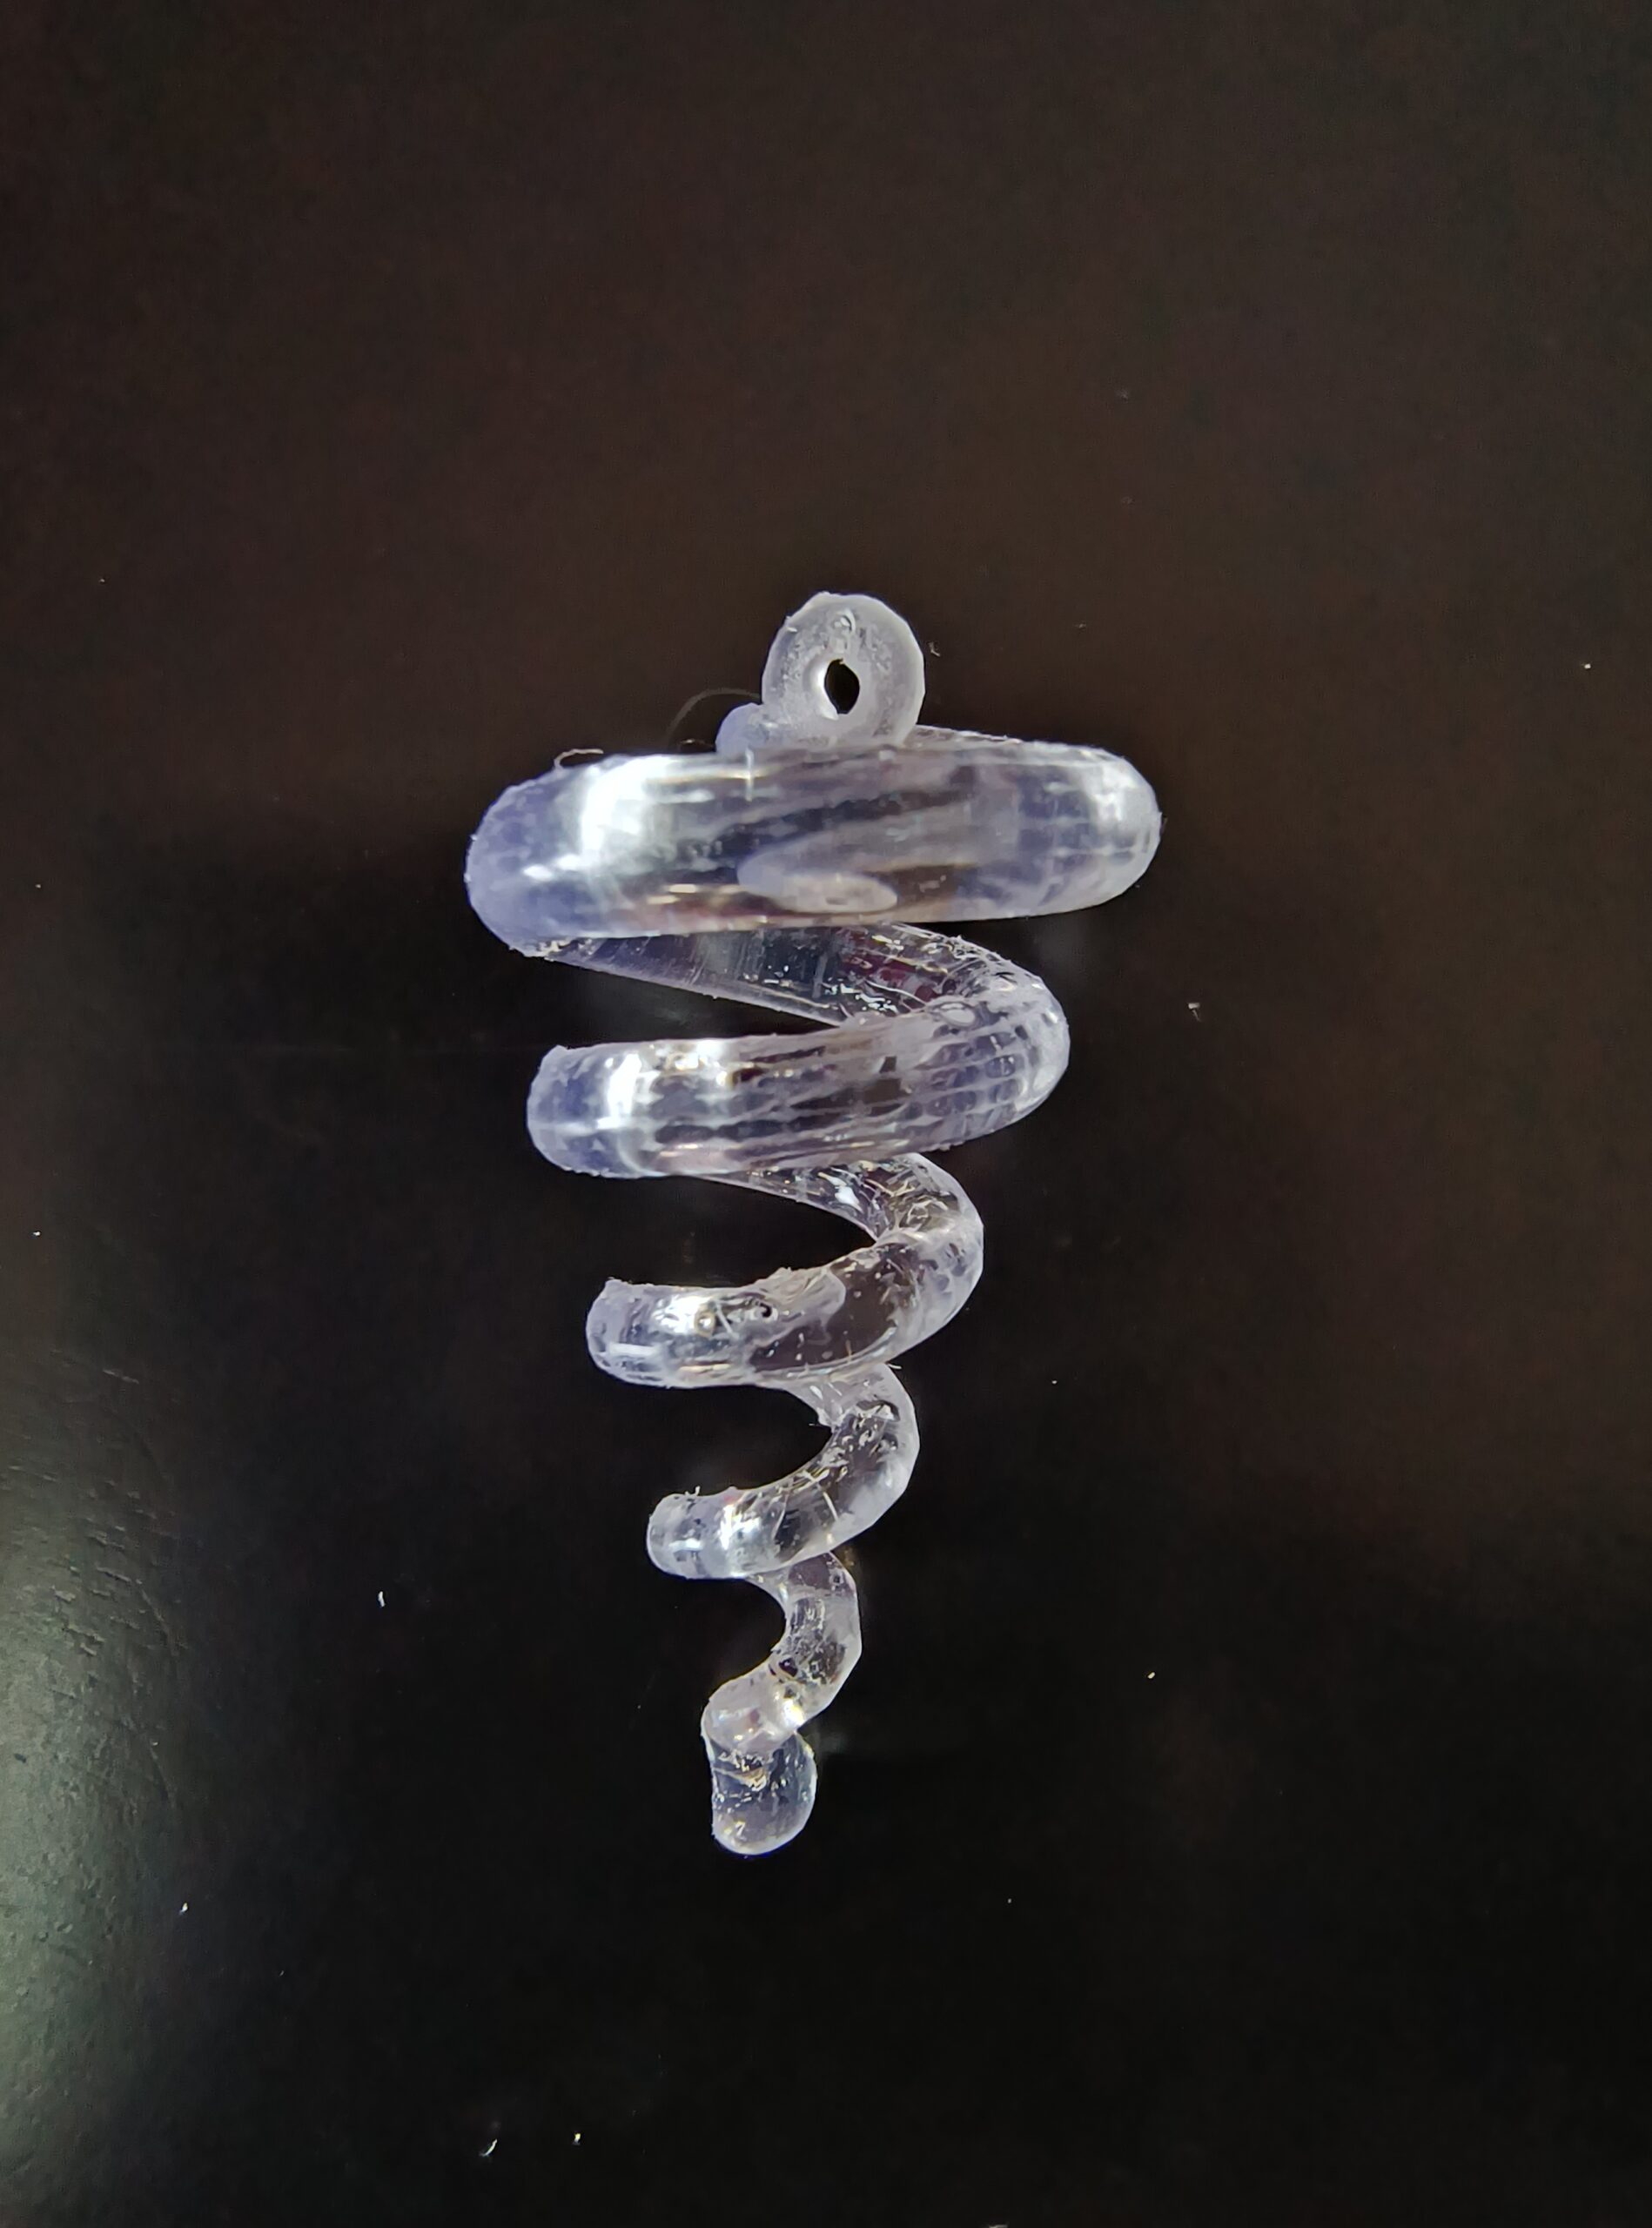
So, by applying a varnish coat, a brand new surface is introduced that is essentially not digitized. This coating adheres to the fractalized cured surface of the part which optically corrects the undesirable refractions; and Voila transparency and clarity is restored. For the tiny jewelry pieces that I build, brush paint wouldn’t work so I dipped the parts in High Clear; allowed to drip excess material; blotted the hanging drips from the lower extremities; then hung the parts from a jig placed on the rotating palette in the ANYCUBIC Wash & Cure 2.0 and blasted it for the recommended 2 minutes. I followed the ANYCUBIC instruction to finish the parts. I’m very happy to say that the parts truly look like they’re made of crystal.

Leave a Reply